Contact KO Floors at

The Ultimate Guide to Custom Stair Railings & Hardwood Stair Refinishing in Nassau County
You’re staring at those worn hardwood floors again, wondering if they’re beyond saving. Those scratches from years of foot traffic, the dull finish that no amount of cleaning can restore, the water stains that seem permanent—it all feels overwhelming.
But here’s what most Long Island homeowners don’t realize: those “ruined” floors are probably just waiting for the right refinishing process to bring them back to life. The key is understanding what actually happens during professional hardwood floor refinishing, so you know what to expect and can spot the difference between real craftsmanship and corner-cutting.
Let’s walk through the exact 4-step process that transforms tired floors into stunning centerpieces.
Every successful floor refinishing project starts with understanding what you’re working with. This isn’t about showing up with a quick estimate—it’s about properly evaluating your floors’ condition, your goals, and the best approach for your specific situation.
During our consultation, we examine your floors for structural issues, moisture damage, and the depth of existing scratches or stains. We’re looking for things like pet urine damage that may have penetrated into the subfloor, or areas where previous DIY attempts created uneven surfaces.
We’ll discuss stain options, finish types, and timeline expectations. This is also when you’ll learn whether your floors can handle another refinishing (most solid hardwood can be refinished up to 10 times) or if certain sections need board replacement first.
Long Island’s coastal climate creates unique challenges that we understand as experienced local contractors. The humidity swings from summer to winter cause natural expansion and contraction in hardwood floors, and many homes feature mixed wood species that respond differently to refinishing.
Oak floors, common in older Long Island homes, handle refinishing differently than maple or cherry. The grain patterns, density, and how they accept stain all vary. Understanding these differences allows us to adjust our approach accordingly, ensuring even results across different wood types in the same room.
Moisture is another factor. Homes near the water or with basement moisture issues need special attention during the assessment phase. We test moisture levels and may recommend dehumidification before beginning work, preventing future problems like cupping or warping.
Our consultation also covers practical concerns specific to Long Island living. How will the work affect your daily routine? Where will furniture go during the process? What about dust control in smaller spaces? These details matter when you’re living in the home during refinishing.
We’ll tell you upfront what refinishing can and cannot accomplish. Deep gouges from heavy furniture may not completely disappear. Pet stains that have penetrated through multiple layers might require board replacement rather than just sanding.
You’ll also learn about the timeline. Most refinishing projects take 3-5 days from start to finish, but this depends on factors like room size, number of coats needed, and drying time between applications. Water-based finishes dry in 2-3 hours between coats, while oil-based finishes need 8-12 hours.
Our consultation includes a detailed breakdown of costs with no hidden surprises. We explain exactly what’s included in our price—sanding, staining, multiple finish coats, cleanup, and any additional services like furniture moving or carpet removal.
This is also when you’ll see samples of our previous work and discuss references. We’re proud to show our craftsmanship and connect you with past clients who can speak to the quality of our work and professionalism during the project.
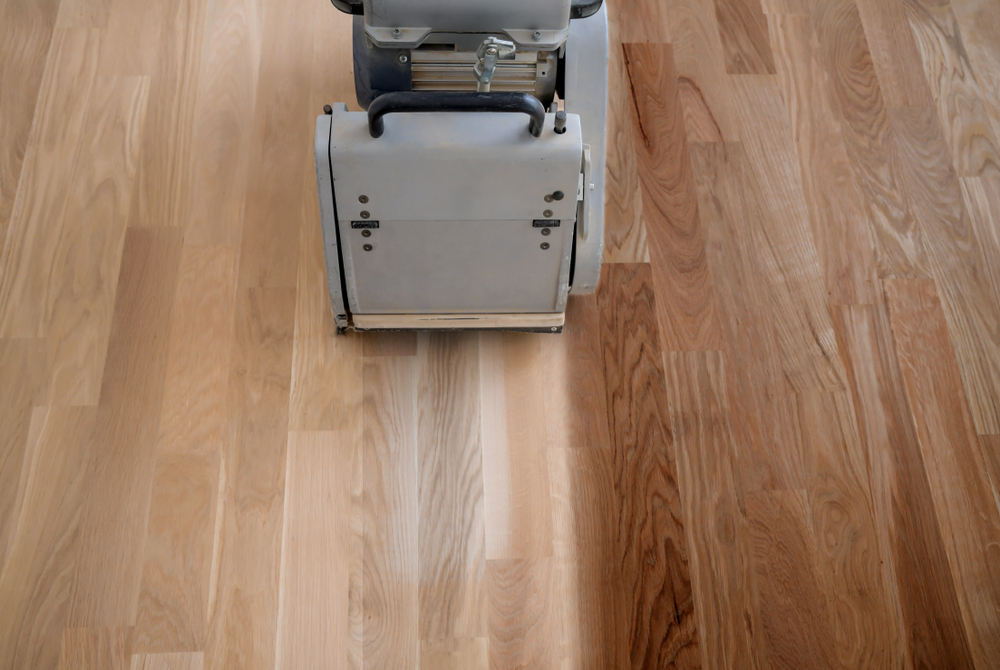
The preparation phase separates professional results from DIY disasters. This step requires industrial-grade equipment, proper dust containment, and the experience to know when to adjust techniques based on what the floor reveals during sanding.
Professional sanding follows a specific grit progression that can’t be rushed or skipped. We start with coarse 36-40 grit sandpaper to remove old finish and level the floor, then move to 60 grit, and finish with 100 grit for floors that will be stained or when working with harder woods like maple.
The dust containment systems we use make a huge difference for your family’s health and your home’s cleanliness. These aren’t the basic shop vacuums you’d rent—they’re specialized systems designed specifically for hardwood floor refinishing that capture dust at the source.
The equipment gap between professional and consumer-grade tools isn’t just significant—it’s the difference between floors that look professionally done and ones that scream “DIY project gone wrong.” Our professional drum sanders can handle multiple grit progressions smoothly and evenly, creating the perfect surface for stain and finish application.
Edge work is where most DIY projects fall apart completely. Those rental edgers are notoriously difficult to control, and the transition between drum-sanded areas and edges often creates visible lines or uneven surfaces that can’t be hidden once stain is applied.
We also understand how different wood species respond to sanding. Maple is so hard and dense that any scratch left in the wood creates a crevice where stain accumulates, making imperfections twice as visible. This is why we sand maple floors to 100 grit—those smaller scratches can’t hold as much color and are easier to camouflage.
The sanding process reveals the true condition of your floors. Sometimes boards that looked salvageable need replacement. Sometimes areas that seemed heavily damaged clean up better than expected. We adjust our approach based on what we find, ensuring the best possible outcome for your specific floors.
The dust from hardwood floor refinishing contains particles that can irritate lungs and settle into HVAC systems, creating ongoing air quality issues. This is particularly important for family members with respiratory sensitivities or allergies.
Our professional dust containment systems use HEPA filtration and sealed containment that adapts to different room configurations and airflow patterns. Long Island homes, particularly older ones, often have unique ventilation challenges that make proper dust control even more critical.
The cleanup difference alone justifies professional installation. Instead of spending days wiping down every surface in your home and changing HVAC filters multiple times, you can actually use your space normally throughout most of the process. We also handle the disposal of all dust and debris, eliminating another concern from your project timeline.
Between each grit progression, we thoroughly vacuum and clean the floor surface. Even tiny particles from previous sanding passes can create scratches during finer grit work, so this step can’t be rushed or skipped.
The final steps transform your newly sanded floors into the vision you had during consultation. Staining is optional, but it’s where you can completely change your room’s character—going darker for drama or lighter for a fresh, natural look.
Professional staining requires working in manageable sections, applying stain with the grain, and wiping away excess before it can create blotchy areas. The timing has to be perfect, and the technique consistent across the entire floor. This is followed by at least three coats of high-quality polyurethane finish, with proper drying time between each application.
Our final inspection ensures every detail meets professional standards. We check for missed spots, uneven sheen, or any imperfections that need attention before considering the job complete. This is your opportunity to walk through with us and address any concerns before we pack up our equipment.
We stand behind our work and won’t consider the job finished until you’re completely satisfied with the results. This attention to detail and commitment to customer satisfaction is what separates true professionals from contractors who just want to get to their next job. When you’re ready to restore your Long Island floors to their former beauty, KO Floors brings the expertise and commitment needed to transform your space.