
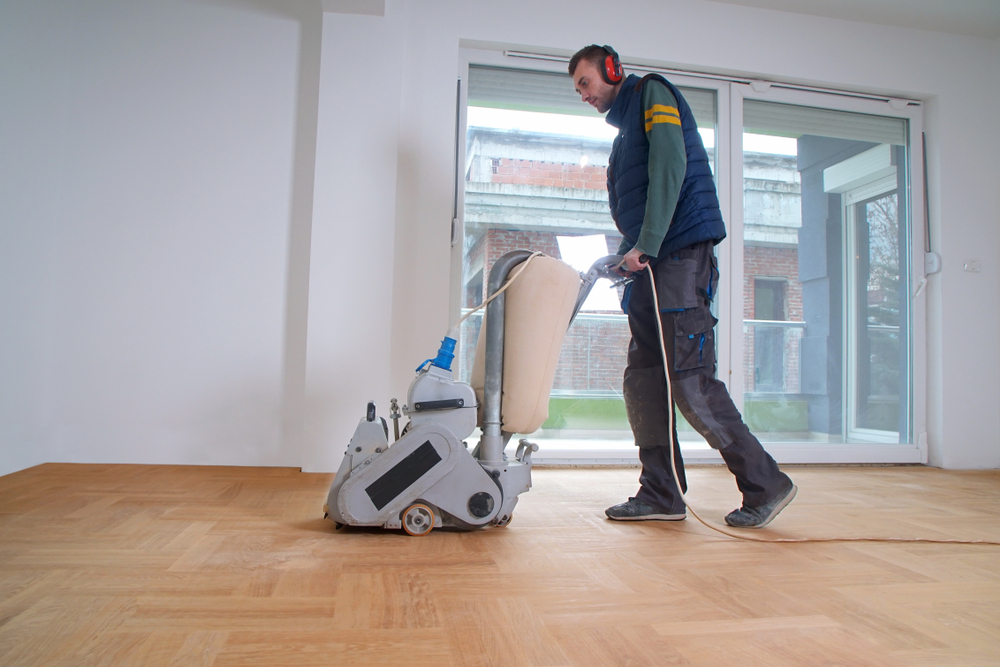
Most people think about hardwood floor refinishing in terms of the finish — the color, the sheen, how it’s going to look when the crew packs up and leaves. That’s understandable. The finish is what you see. But every experienced floor refinisher knows that what you see at the end is almost entirely determined by what happened before the finish was ever opened.
Sanding isn’t setup. It’s the job. And if it’s rushed, skipped in stages, or left uneven near the walls, no amount of quality finish product will cover it up. Here’s what that actually means for your floors — and your decision.
Floor Sanding and Staining: Why the Two Steps Are Inseparable
Sanding and staining are often talked about as separate steps in a sequence. In practice, they’re one continuous decision. The way a floor is sanded directly determines how it takes stain — how evenly the color absorbs, whether the grain looks rich and consistent, and whether the final result matches what you had in mind when you picked the color.
The final grit pass matters more than most homeowners realize. For any floor that’s going to be stained, 100-grit is the standard finishing pass. Coarser grits leave micro-scratches in the wood surface that cause stain to absorb unevenly — which shows up as streaks, blotchiness, or a color that looks nothing like the sample. Finer grits close the grain too much and prevent the stain from penetrating properly.
The grit sequence isn’t arbitrary. It’s calibrated to the result you’re trying to achieve.
What Happens When Grit Stages Get Skipped
A proper sanding job moves through multiple grit stages — typically starting coarser to remove the old finish and level the surface, then progressing finer to prepare the wood for stain or a clear finish. The American Hardwood Information Center recommends sanding hardwood flooring three times with successively finer grades of paper, with thorough vacuuming between each pass. That’s the baseline for professional-quality work.
When a contractor skips stages — jumping from a coarse grit straight to a fine one to save time — the scratches from the earlier pass don’t get removed. They’re still there in the wood surface, and once stain goes down, they show up. Under raking light, you can see them clearly: faint parallel lines running across the floor that catch the eye every time the sun hits at a certain angle.
There’s no fixing that without going back to square one. This is one of the most common ways a floor refinishing job goes wrong, and it’s almost always invisible until the stain is applied. By then, the floor has to be re-sanded — which means more time, more disruption, and more wood removed from a surface that has a finite number of refinishing cycles left in it.
The National Wood Flooring Association recommends a minimum wear layer of 3mm for safe sanding. Every time a floor is re-sanded, that number gets smaller. Getting the process right the first time isn’t just about quality — it’s about preserving your floor’s future refinishing options.
Edge sanding is the other place where shortcuts show up. The drum sander that covers the main field of the floor can’t reach within a few inches of the walls. That area has to be done with a dedicated edger, and the corners require hand work. When that detail is skipped or rushed, you get a visible ring near the baseboards — a slightly different color or sheen that runs the perimeter of the room and announces itself to anyone who looks.
What a Proper Sanding Process Actually Looks Like
A well-executed sanding job is methodical. It starts with assessing the floor — checking the wear layer, identifying problem areas, noting any previous finish residue or damage that needs to be addressed before the first pass. In Nassau County, where a large portion of the housing stock was built between the 1940s and 1970s, that assessment step matters more than it might in a newer home.
Original red oak floors in a 1955 Cape in Rockville Centre or a split-level in Merrick have often been refinished once or twice before. They may have decades of sun exposure, uneven aging, or old finish layers that affect how they respond to sanding and stain. We account for that history from the start.
After the assessment, the sanding sequence begins — multiple passes with progressively finer grits, edging along the walls, and hand work in corners and tight areas. Between passes, the floor is vacuumed thoroughly and wiped down. Dust left on the surface between passes acts like a buffer that prevents the next grit from doing its job cleanly.
Once the field and edges are sanded to the same final grit and the surface is clean, the floor is ready for stain — if stain is part of the plan. If you want a clear finish, the floor goes straight to finishing. Either way, the surface prep is done. And that prep is what everything else is built on.
We’ve been refinishing hardwood floors on Long Island for over 50 years, and the pattern is consistent: the jobs that come out exactly right are the ones where the sanding was done without shortcuts. The jobs that require callbacks — or full re-sands — almost always trace back to something that was rushed in the prep phase.
Hardwood Floor Refinishing Colors: The Part Nobody Warns You About
Choosing a stain color feels like it should be straightforward. You look at a chart, pick something you like, and the floor comes out that color. That’s not quite how it works.
The color you see on a 4-inch sample board in a showroom is not the color you’ll see on 1,200 square feet of your actual floor, in your actual lighting, next to your actual furniture and walls. The gap between those two things is where most stain color regret lives. And it’s a gap that we close before the stain ever gets opened.
Floor Stain Samples: Why Testing on Your Actual Floor Is Non-Negotiable
The professional standard — the approach that prevents regret — is testing stain colors directly on your sanded floor before committing to any of them. Not on a chip. Not on a photo. On the actual wood, in the actual room, where the actual light hits it throughout the day.
This matters because stain color is affected by the wood species, the grain pattern, the age of the floor, and the ambient light in the space. Red oak — the most common species in Nassau County homes — has a pinkish undertone in the grain that affects how stains read. Gray stains, in particular, can shift toward purple on red oak without proper preparation.
A color that looked cool and neutral on a showroom sample board can read warm and rosy on your floor. The only way to know what you’re actually getting is to put the stain on the actual surface and let it dry in the room.
Older Nassau County hardwood adds another layer of complexity. Floors that have been exposed to decades of sunlight develop uneven aging patterns — boards near windows lighten differently than boards in shadowed areas. Previous finish layers, even when sanded down, can leave trace residue that affects absorption. A floor in a 1960s colonial in Garden City or a post-war ranch in Wantagh isn’t a blank slate. It has a history, and that history influences how any new stain color lands.
Testing two or three colors on the actual sanded floor, in patches large enough to evaluate, is how you make a decision you can live with. We walk every client through this process before any stain goes down. It takes a little more time at the front end, and it eliminates the kind of outcome where the floor is done and you’re already second-guessing the color.
Wood Floor Stain Colors Chart: What It Shows — and What It Doesn’t
A stain color chart organizes colors by family and tone — natural and blonde at one end, medium browns and warm ambers in the middle, dark walnut and ebony at the other end, with gray and whitewash options often running separately. It’s a useful reference for understanding what’s available and for ruling out categories that clearly aren’t what you want.
What a chart can’t show you is how a given color will interact with your specific wood species, your floor’s grain density, the direction and quality of light in your rooms, or the undertones in your walls and fixed finishes. Two floors finished with the same stain color from the same manufacturer can look noticeably different from each other if the wood species, age, or prep conditions differ. That’s not a flaw in the product — it’s just how wood works.
This is worth understanding before you sit down with us and we hand you a chip card and ask you to choose. That process puts the entire color decision on you, based on information that isn’t sufficient for making it. A better process involves narrowing down to two or three candidates from the chart, then testing those candidates on your actual sanded floor before any commitment is made.
For Nassau County homeowners who are refinishing floors before listing a home — a common situation in a real estate market where median home prices run well above $600,000 — the stain color decision carries real weight. Refinished floors are a standard expectation in this market, and the color sets the tone for how a home photographs and how buyers respond when they walk through. Getting it right matters, and it starts with testing on the real surface, not choosing from a chart.
Sheen level is a separate decision from color, and it affects the overall look just as much. Matte and satin finishes read as more natural and contemporary. Semi-gloss and high-gloss finishes reflect more light and show more foot traffic over time. Most Nassau County homeowners we work with are moving away from high-gloss in favor of satin or matte — but the right answer depends on the home, the lighting, and how you use the space. That conversation is part of what we cover in every consultation.
Choosing the Right Hardwood Floor Refinishing Company in Nassau County
Hardwood floor refinishing done right isn’t complicated — but it does require doing the steps in the right order, without shortcuts, and with enough experience to know what can go wrong and how to prevent it. The sanding determines the stain result. The stain test determines whether you’ll love the color. And the finish is only as durable as the prep beneath it.
If your floors are in a Nassau County home — whether it’s a 1950s Cape in Lynbrook, a colonial in Manhasset, or something closer to the water in Long Beach — the wood has a history that affects how this process plays out. We know that history, and we account for it.
We’ve been doing this work on Long Island for over 50 years. If you want to talk through what your floors need and what to expect from the process, reach out to KO Floors, Inc. — we’re happy to take a look and give you a straight answer.