
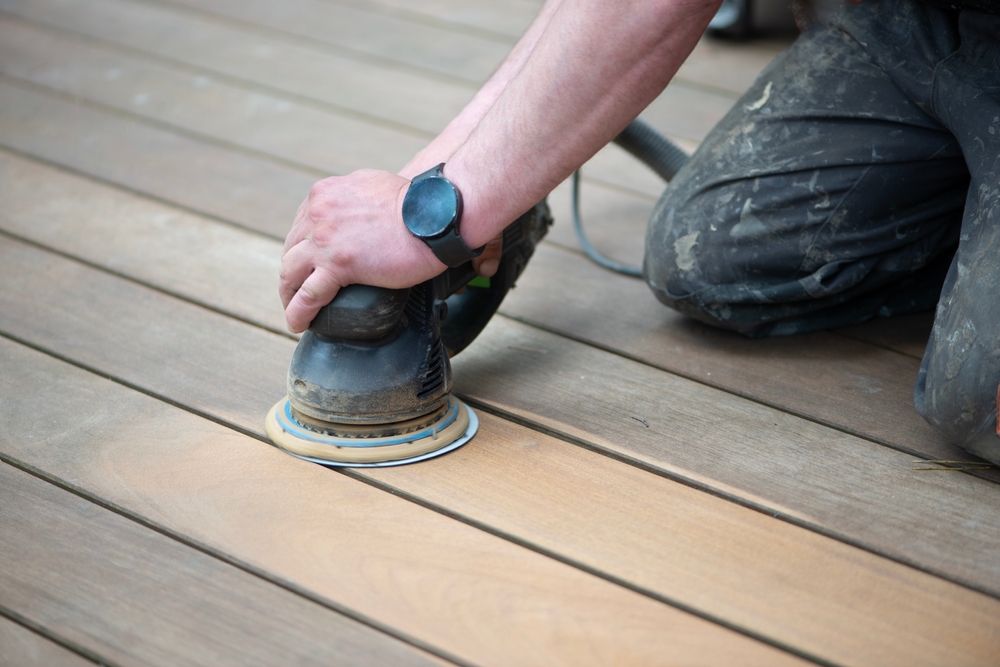
A lot of Nassau County, NY homeowners discover the same thing mid-renovation: there’s real hardwood under that carpet. Sometimes it’s in rough shape. Sometimes it’s surprisingly intact. Either way, the question is the same — can this be saved, and what does it actually take to bring it back?
Refinishing hardwood floors isn’t complicated to understand, but there’s a lot of room for shortcuts that don’t show up until months later. We’ve walked hundreds of Long Island homeowners through this process, and we’ve seen firsthand what separates a proper job from one that fails. This guide breaks down the full process — sanding, staining, and finishing — so you know exactly what to expect, what questions to ask, and what your floors are actually capable of.
Hardwood Floor Sanding: The Step That Determines Everything Else
Sanding is where the real work happens. It’s not just about removing the old finish — it’s about leveling the surface, eliminating scratches and stains, and creating a clean foundation that stain and finish can actually bond to.
Skip a step here, or rush through it, and the problems show up fast. A proper sanding job uses multiple passes at progressively finer grits. Starting coarse removes the old finish and levels the wood. Moving through the middle grits smooths out the roughness left by the coarser paper. The final passes — and a screen-sanding pass with a floor buffer — leave the surface ready for stain without visible scratches underneath.
That sequence matters. Every grit in the chain has a job, and skipping one leaves marks that stain makes more visible, not less.
Why the Sanding Sequence Matters More Than the Equipment
A lot of contractors talk about their equipment. Yes, the machine matters — but what matters more is whether the person running it knows how to use it correctly and doesn’t cut corners on the grit sequence.
Here’s what a thorough sanding process actually looks like: the job starts with a coarse grit — typically in the 36 to 40 range — to strip away the old finish and remove surface-level damage. This is the heavy lifting. From there, the floor gets a pass at 60 grit to smooth out the coarser scratches, then a final drum pass at around 100 grit to prepare the surface for staining. After that comes screen sanding with a floor buffer, which removes any remaining fine scratches and ensures the surface is even before anything is applied.
Edge work is a separate step that often gets overlooked. A drum sander can’t reach the perimeter of the room, so a handheld edger handles the borders. The quality of the blend between the main floor and the edges is one of the clearest signs of a careful job — when it’s done right, you can’t tell where one machine stopped and the other started.
For Nassau County, NY homes specifically, this process carries extra weight. Most of the housing stock here dates to the 1940s through 1960s, when solid oak was the standard subfloor material. Those floors are 60 to 80 years old. Some have been covered with carpet since the 1970s. When they come back out into the open, they’re often in better shape than expected — but they need a careful hand, not an aggressive one.
Floors that have never been refinished have plenty of wood left in them, but that also means there’s no margin for a sander operator who moves too slowly in one spot or skips a grit to save time. One more thing worth knowing: dust. Sanding generates a significant amount of it, and it travels. We cover HVAC vents, protect kitchen appliances, and manage dust carefully before work starts — and we’re happy to walk you through our process upfront.
Can Your Floors Actually Be Refinished? What to Know Before Assuming
Not every floor is a candidate for full refinishing, and it’s worth understanding why before you get a quote.
Solid hardwood floors — the kind found in most Nassau County, NY homes built before 1975 — can typically be refinished multiple times over their lifetime. The wear layer is thick enough to withstand sanding, and a floor that’s never been touched before has significant material to work with. These floors are almost always good candidates.
Engineered hardwood is a different story. Engineered floors are constructed with a thin veneer of real wood over a plywood or composite core. If that veneer is thinner than about 2mm, sanding through it is a real risk — and once you’ve gone through the veneer, the floor is done. We can assess this before any work begins, but it’s important to know going in that “hardwood-looking floors” and “refinishable floors” aren’t always the same thing.
Floors that have already been refinished several times may also be approaching their limit. Each sanding pass removes a thin layer of wood, and eventually the floor gets too thin to sand safely. This is more common in older homes that have had multiple owners and multiple renovation cycles. We’ll tell you honestly where your floors stand rather than take the job and figure it out later.
The other scenario worth mentioning: floors with deep pet staining. Surface-level pet damage — scratches, worn finish — is handled easily by sanding. But urine that has soaked through the finish and into the wood itself can leave staining that sanding alone won’t fully remove. There are treatments that help, but it’s worth having an honest conversation about expectations before the job starts rather than after.
Hardwood Floor Finishing: Choosing the Right Topcoat for Your Nassau County Home
Once the floor is sanded and stained, the finish is what protects everything underneath it. It’s also where a lot of homeowners have the most questions — and where the choices you make affect how your floors look and hold up for years.
The two main categories are oil-based and water-based polyurethane. Oil-based finishes have been the industry standard for decades. They dry slower, have a stronger odor during application, and add a warm amber tone to the wood. Water-based finishes dry faster, have significantly lower VOC levels, and dry clear — which preserves the natural color of the wood rather than warming it.
Neither is universally better. The right choice depends on the wood species, the stain color, your timeline, and how much disruption you can tolerate during the process.
Wooden Floor Polishing and the Final Finish Coats: What the Process Actually Involves
After staining, the finish is applied in multiple coats — typically two to three — with light sanding between each coat to ensure adhesion and a smooth final surface. This between-coat sanding is often called wooden floor polishing or buffing, and it’s not optional. Skipping it leaves a finish that doesn’t bond as well and shows imperfections more easily under light.
The number of coats matters, and so does the drying time between them. Rushing a second coat onto a first that hasn’t fully dried creates adhesion problems that show up as peeling or bubbling months later. A crew that’s trying to finish a job in a single day is almost certainly cutting corners somewhere in this process.
Sheen level is another decision point. Finishes are available in matte, satin, semi-gloss, and gloss. Matte and satin are the most popular choices right now because they hide everyday wear better than glossier finishes — dust, light scratches, and foot traffic show up more on a high-gloss floor. For busy Nassau County, NY households with kids and pets, satin tends to be the most practical choice.
After the final coat, the floor needs time to cure before rugs and furniture come back. Light foot traffic is usually fine within 24 hours, but furniture should stay off for several days, and area rugs typically need to wait two weeks or more. Full cure — the point at which the finish has reached its maximum hardness — takes longer, sometimes up to a month.
For Nassau County, NY homeowners, humidity is worth factoring in here. Long Island summers are humid, and that affects how finishes dry and cure. Scheduling refinishing work in spring or fall — when humidity is more moderate — tends to produce better results and fewer complications than trying to push a job through in July.
Hardwood Floor Resurfacing vs. Full Refinishing: Which One Do You Actually Need?
These two terms get used interchangeably, but they describe different processes — and understanding the difference could save you money or help you avoid a job that doesn’t actually solve your problem.
Full refinishing means sanding the floor down to bare wood, applying stain, and laying down new finish coats. It addresses surface damage, changes the color if you want, and gives you a completely fresh start. It’s the right choice when floors have visible scratches, worn finish, water stains, or significant discoloration — or when you want to change the stain color entirely.
Hardwood floor resurfacing — sometimes called a screen and recoat — is a lighter process. Instead of sanding to bare wood, the existing finish is lightly scuffed with a fine-grit screen to give it texture, and a new topcoat is applied over it. It refreshes the sheen and adds a layer of protection, but it doesn’t remove scratches or change the color. It’s appropriate for floors that are in decent shape but have lost their luster, and it costs less than full refinishing because the labor involved is significantly lower.
Some contractors offer a screen and recoat when a customer actually needs full refinishing — because it’s faster and easier. If your floors have visible damage, dull patches that don’t respond to cleaning, or areas where the finish has worn through to bare wood, a screen and recoat won’t fix them. You’ll end up with a shiny version of the same problem.
On the other hand, if your floors are in good shape and you’re just maintaining them, a screen and recoat every few years is a smart way to extend the life of the finish and delay the need for a full refinishing job. In Nassau County, NY, where most homes have original hardwood that’s been through decades of use, full refinishing is usually what’s called for. We’re happy to give you a straightforward assessment of which one you actually need.
What to Expect from a Professional Wood Floor Refinishing Job
A well-done refinishing job transforms floors that look like they’re past saving into something that genuinely looks new. The process — done right — takes a few days, involves careful sanding in the correct sequence, stain application after the floor is completely clean and dust-free, and multiple finish coats with proper drying time between each one.
The difference between a great result and a disappointing one almost always comes down to whether those steps were followed or rushed. Asking a contractor to walk you through their process before you hire them is one of the most useful things you can do.
If your Nassau County, NY home has hardwood floors that need attention — whether you just discovered them under old carpet or they’ve been visible for years and are showing their age — we at KO Floors, Inc. offer free, no-obligation estimates and have been doing this work across Long Island for a long time. Reach out and find out what your floors are actually capable of.