
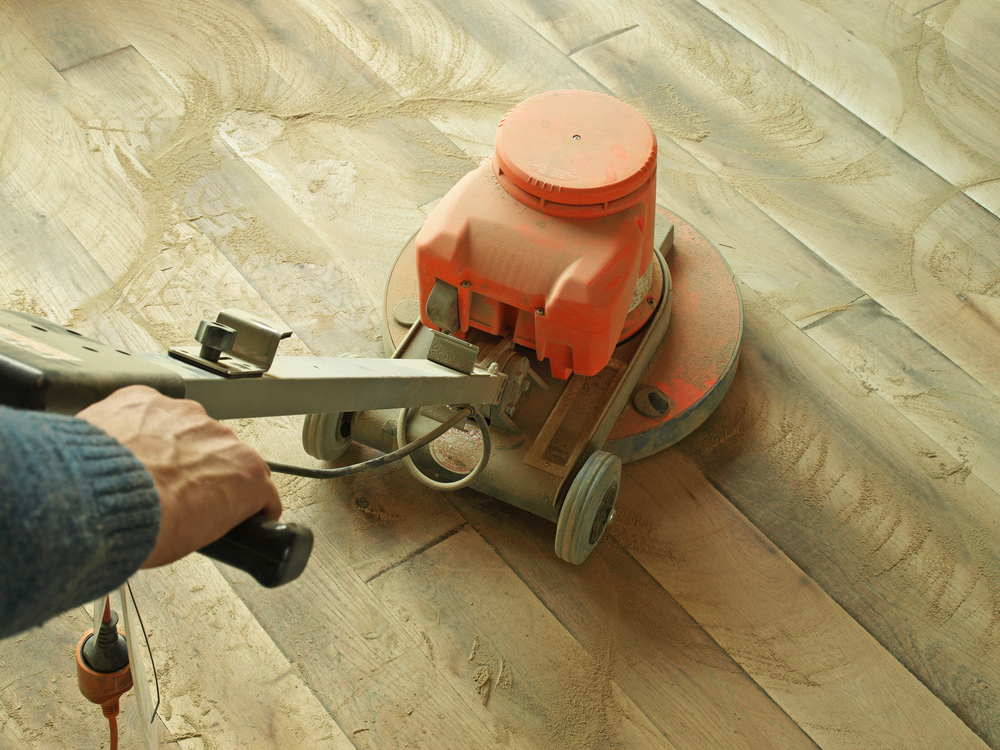
Most Nassau County homes were built in the same post-war window — the late 1940s through the 1960s — and most of them were built with solid red oak hardwood floors. Those floors have outlasted multiple generations of furniture, kids, pets, and renovation trends. But at some point, the finish gives out. The scratches accumulate. The color starts to look dated. And you’re left wondering whether the floors can actually be saved, or whether you’re looking at a full replacement.
The short answer, in most cases, is that they can absolutely be saved. Here’s how the process works — and what to watch for at every stage.
Sanding and Refinishing Hardwood Floors: What the Process Actually Looks Like
Professional wood floor refinishing isn’t one step — it’s a sequence, and each stage builds on the one before it. When any part of that sequence gets rushed or skipped, the results show up later: uneven color, visible swirl marks under the stain, finish that peels prematurely, or patches that don’t blend.
The process starts with a thorough assessment of the floor’s condition — checking for boards that need repair, measuring wear layer depth on engineered floors, and identifying any moisture or structural issues before a sander ever touches the surface. From there, the actual sanding begins, working through a progression of grits from coarse to fine. That progression matters. Jumping grits leaves scratches that stain will highlight rather than hide.
Wood Floor Sanding and Refinishing: The Grit Progression That Most People Don’t Know About
A professional sanding job typically starts with a 36 to 40 grit abrasive — aggressive enough to cut through the old finish and any surface damage — then moves to 60 grit, then 80, and finishes at 100. Each pass removes the scratch pattern left by the previous one. By the time you reach 100 grit, the wood surface is smooth and ready to accept stain evenly.
This is one of the clearest ways to tell whether a contractor is doing the job properly. A crew that skips grits to save time is cutting corners in a way that’s invisible until the stain goes down — and then it’s too late. The swirl marks and uneven patches are locked in under the finish.
After the main sanding passes, the floor gets screen-sanded using a floor buffer with a fine-grit screening pad. This step removes any remaining minor unevenness and prepares the surface for the finish. Any gaps, cracks, or small holes get filled with wood filler and sanded smooth before the staining phase begins.
Dust containment is another factor worth asking about upfront. Older refinishing methods filled entire houses with fine sawdust that settled into everything — cabinets, HVAC systems, window sills. Modern dustless systems capture the majority of that debris at the source. It’s not a perfect science, but the difference between a dustless setup and a traditional one is significant, especially in occupied homes.
Once sanding is complete and the floor is vacuumed clean, the surface is ready for stain — or, if you’re going with a natural finish, directly for the first coat of polyurethane.
Professional Wood Floor Refinishing: What Happens Between Sanding and the Final Coat
After sanding, the floor is at its most vulnerable — and its most honest. Every old repair, every board that was replaced at some point, every area where the wood behaved differently is visible now. A skilled contractor reads the floor at this stage and adjusts the plan accordingly.
If stain is going on, it gets applied after the floor is clean and dry. Stain drying time runs roughly 36 to 48 hours depending on the color — darker stains take longer, and poor ventilation or cold temperatures slow things down further. This is not a step to rush. Applying finish over stain that hasn’t fully cured leads to adhesion problems and a finish that won’t hold up.
The finish itself is typically applied in two to three coats, with a light screening between coats to ensure adhesion and smoothness. Oil-based polyurethane takes longer to dry between coats but produces a harder, more amber-toned finish. Water-based polyurethane dries faster, has lower VOCs, and stays clearer over time — which matters if you’re trying to keep a lighter or gray-toned floor looking the way it did on day one.
After the final coat, the floor needs time to cure. You can typically walk on it within 24 hours, but rugs and furniture should stay off for 15 days to allow the finish to fully harden. This is the step homeowners most often skip — and the one that most often leads to early finish damage.
Hardwood Floor Stain Colors: Choosing the Right Look for Your Nassau County Home
Stain color is where a lot of homeowners freeze up — and understandably so. It feels permanent, and the difference between a sample chip and a finished floor in your actual home can be significant. Lighting, wood species, and the number of sanding passes all affect how a stain reads once it’s down.
The good news is that refinishing gives you a genuine opportunity to change the look of your floors entirely. You’re not stuck with what you have. But the choices you make at this stage depend heavily on the species of wood you’re working with — and in Nassau County, that usually means red oak.
Stains for Red Oak: What Works, What Doesn’t, and Why Gray Is Complicated
Red oak is the dominant species in Nassau County’s post-war housing stock, and it has a strong grain pattern and a natural pinkish-orange undertone that affects how stains read. This is important to understand before you fall in love with a color on someone else’s floor — because that floor might be white oak, which is a completely different canvas.
Dark stains like Jacobean — a deep, rich brown — tend to work well on red oak because the dark pigment overwhelms the pink undertone. Jacobean has been one of the most popular stain choices on Long Island for years, and for good reason: it’s dramatic, it ages well, and it reads as warm and traditional in the kinds of homes that dominate Nassau County neighborhoods.
Gray is trickier. The pink undertone in red oak fights gray pigment, which is why gray floors on red oak can come out looking purple or lavender if the stain isn’t applied correctly. Achieving a true gray on red oak typically requires a pre-conditioner or a custom-blended stain — not just a single off-the-shelf gray. If a gray floor is what you’re after, make sure the contractor has actually done it on red oak before, not just on white oak or maple.
White oak stain colors translate more cleanly because white oak has cooler, more neutral undertones. If you’re working with white oak floors — more common in higher-end homes and newer construction — you have more flexibility with lighter, cooler tones. Wire-brushed natural finishes, pale grays, and warm blondes all read more predictably on white oak than on red.
Popular hardwood floor stain colors that tend to hold up well over time — and that we see consistently in Nassau County homes — include natural (no stain, just finish), Jacobean, Early American, Ebony mixed with other stains for a softer dark, and custom gray blends for homeowners chasing a more contemporary look.
Water Damaged Hardwood Floors: When Refinishing Can Fix It and When It Can’t
Water damage is one of the most common reasons Nassau County homeowners reach out to us — and it’s also one of the most misunderstood. The assumption is usually that water-damaged floors need to be replaced. That’s not always true, but it depends on what kind of damage you’re dealing with and how long the water sat.
Surface-level water stains — the white rings and cloudy patches you get from a spill that sat too long — are almost always correctable through sanding. The stain is in the finish, not the wood itself, and sanding removes the finish entirely. Once the floor is sanded back to bare wood, those marks are gone.
Deeper damage is a different story. If boards have cupped — meaning the edges are higher than the center — it may be possible to sand them flat, but only after the moisture content of the wood has returned to normal. Sanding cupped floors before they’ve dried out fully just creates a new problem: the boards flatten as they dry, and you end up with a crowned floor instead. A good contractor will check moisture levels before touching a cupped floor.
Black staining in the wood is the indicator that damage has gone deep — into the fiber of the board itself, not just the surface. Black stains from pet urine or prolonged water exposure typically can’t be sanded out. Board replacement — what the industry calls “lacing in” new boards to match the existing floor — is the standard approach in those cases.
Nassau County’s South Shore communities in Long Beach, Oceanside, Merrick, Bellmore, and Wantagh saw significant water damage after Hurricane Sandy in 2012, and many of those homes have changed hands since then. If you’re buying or renovating in these areas, it’s worth having the floors assessed for moisture and structural integrity before assuming refinishing alone will do the job. Hardwood floor repair cost for board replacement work varies depending on the extent of the damage, but addressing it properly at the refinishing stage is almost always less expensive than dealing with it after the finish is down.
Hiring a Professional Hardwood Floor Refinishing Company in Nassau County
Refinishing hardwood floors is one of the higher-return investments you can make in a Nassau County home — not because of some abstract resale statistic, but because the floors are already there, they’re solid wood, and they were built to last. Most of them just need someone who knows what they’re doing to bring them back.
The process works when every stage is done in the right order, at the right pace, with the right materials. It fails when steps get skipped, grits get jumped, or stain goes down before the wood is ready. Choosing a contractor who can walk you through exactly what they’ll do — and why — is the clearest signal that the job will come out the way it should.
If you’re dealing with worn floors, water damage, an outdated stain color, or floors you just discovered under old carpet, we’re happy to take a look and give you a straight answer about what’s possible. We’ve been doing this work on Long Island for over 50 years — reach out for a no-obligation quote and we’ll tell you exactly what your floors need.