
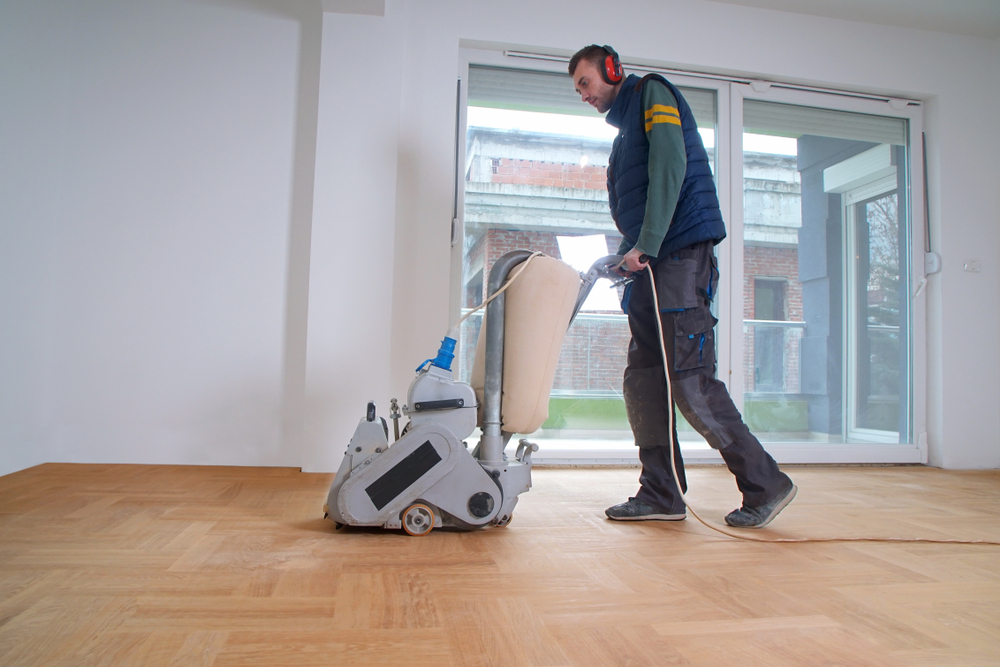
If you’ve been putting off refinishing your floors because the whole thing sounds like a nightmare — the dust, the fumes, the furniture chaos — you’re not alone. That’s exactly the kind of hesitation we hear from Nassau County, NY homeowners all the time, and honestly, it’s understandable. A lot of contractors don’t do a great job explaining what actually happens in your home.
So here’s the straightforward version: what professional floor sanding involves, what you should expect at each stage, when you might be able to skip it altogether, and how to know if the company you’re talking to actually knows what they’re doing.
What Does Sanding Floors Actually Involve?
Floor sanding is the process of mechanically removing the existing finish — and sometimes the top layer of the wood itself — so the surface can be refinished from scratch. It’s not just running a sander across the room. Done properly, it’s a multi-stage process that requires the right equipment, the right sequence, and enough experience to read what the floor is telling you as you go.
The goal is to get down to clean, bare wood — smooth, level, and ready to absorb stain evenly before a new finish is applied. When it’s done right, the result looks like a brand-new floor. When it’s rushed or done out of sequence, you’ll see the evidence in the final finish.
The Step-by-Step Process of Professional Floor Sanding
Before any equipment comes out, we inspect the floor. That means checking for protruding nails, squeaky boards, moisture issues, and — critically — how much wear layer is left. The NWFA specifies that a floor shouldn’t be sanded if the wear layer is thinner than 3/32 of an inch. Skipping this step is one of the clearest signs you’re dealing with someone who doesn’t know what they’re doing.
Once the floor is cleared and inspected, the sanding begins in stages. The first pass uses a coarse-grit paper — typically in the 36 to 40 grit range — to strip the old finish and level out any imperfections. This is the most aggressive stage, and it’s where most of the material is removed.
From there, the process moves through progressively finer grits: medium (around 60 to 80), then fine (100 to 120). Each pass smooths out the marks left by the previous one. Skipping a grit stage is a shortcut that shows up clearly in the finished floor — visible scratch patterns under the sheen.
The main field sander handles the open floor area, but it can’t reach the edges. That’s where a dedicated edge sander comes in, working along the perimeter of the room where the drum can’t go. After the edging, the floor is screened — lightly buffed with a fine abrasive to eliminate any remaining drum marks and create a uniform surface across the whole room.
Between every stage, the floor is thoroughly vacuumed and wiped down with a tack cloth. Any dust left on the surface before applying finish will show up as bumps and debris in the final coat. This step gets skipped by contractors who are moving too fast.
After sanding is complete, stain is applied if you want a color change — worked into the grain in manageable sections, then wiped back before it dries. Once the stain is set, the finish coats go on. Water-based finishes dry in two to four hours between coats; oil-based finishes need eight to twenty-four hours. Most jobs require two to three coats of oil-based finish or up to four coats of water-based. Light sanding or screening between coats helps each layer bond properly to the one below it.
Is Dustless Floor Sanding in Nassau County Really Dustless?
This is one of the most common questions we get, and it deserves a straight answer: no, not completely. Any contractor telling you their process produces zero dust is either misinformed or not being honest with you. What professional-grade dustless sanding systems actually achieve is approximately 98% containment. That’s a meaningful number — dramatically better than a standard shop-vac setup, which captures maybe 70 to 80 percent — but it’s not the same as zero.
For most Nassau County, NY homes, 98% containment means the difference between a job that leaves your home livable and one that leaves a fine layer of sawdust on every surface in the house. Modern planetary sanding systems with full vacuum integration do an impressive job of capturing dust at the source before it becomes airborne. You’ll still want to cover HVAC vents and move sensitive electronics out of the immediate work area, but you won’t be cleaning your kitchen counters for a week afterward.
The reason this matters in Nassau County specifically has to do with the housing stock. A lot of homes here — particularly in communities like Massapequa, Merrick, Wantagh, and Seaford — were built in the late 1940s through the 1960s, and many of them have original solid oak floors that haven’t been touched in decades. Those floors have aged finishes that generate a significant amount of debris when sanded.
The better the containment system, the less of that debris ends up in your living space. If a contractor can’t tell you specifically what equipment they use or how their dust containment works, that’s worth noting. Owning professional-grade equipment — rather than renting a drum sander from a big-box store — is one of the clearest indicators of a serious operation. It’s not a minor detail.
Refinishing Hardwood Floors Without Sanding — When It Works and When It Doesn’t
Not every floor needs a full sand. There’s a lighter alternative called screen-and-recoat — sometimes called buff-and-coat — that involves lightly abrading the existing finish with a buffer and applying a fresh coat of polyurethane on top. It’s faster, less disruptive, and less expensive than a full sand-and-refinish job.
The catch is that it only works under specific conditions. If your finish is still intact, the wood has no bare spots, and the damage is limited to surface-level dullness and minor scratches, a screen-and-recoat can absolutely restore the floor’s appearance. If the finish is peeling, the wood is bare in high-traffic areas, or there are deep scratches, water stains, or pet damage, a recoat won’t fix it — it’ll just apply a new layer over a compromised surface, and that layer will fail.
How to Tell If Your Nassau County Home’s Floors Need Full Sanding or Just a Recoat
There’s a simple field test worth knowing: pour a small amount of water on the floor and watch what happens. If it beads up and sits on the surface, the finish is still doing its job. If it absorbs into the wood within ten seconds or so, the finish is essentially gone, and a recoat won’t bond properly. You need a full sand.
Beyond the water test, look at the floor in raking light — light coming in at a low angle from a window or lamp. You’ll see things you’d miss in normal overhead lighting: drum marks from a previous sand job, areas where the finish has worn through to bare wood, cupping or crowning across the boards. Any of those conditions typically calls for a full refinish, not a surface treatment.
In Nassau County’s older homes, this distinction matters a lot. Many of these floors were last refinished in the 1970s or 1980s, if at all. Some were covered with carpet for decades and have only recently been uncovered. A floor in that condition usually has a finish that’s well past the point where recoating would hold. A screen-and-recoat might look acceptable for a few months, but it’s likely to fail in the high-traffic lanes — the hallway, the entry, the path from the kitchen — within a year or two.
The honest answer from any contractor worth hiring should be: let us look at the floor first. An assessment before a recommendation is the only way to give you accurate advice. Anyone quoting a screen-and-recoat over the phone without seeing the floor is guessing.
Can Engineered Wood Floors Be Sanded?
Sometimes — but not always, and it depends entirely on the wear layer thickness. Engineered hardwood is constructed with a real wood veneer on top of a plywood core. The NWFA specifies that a factory-finished engineered floor needs at least 2.5mm of wear layer remaining to be safely sanded. For unfinished smooth engineered wood, the minimum is 3.2mm. Sculpted or distressed surfaces need at least 2.5mm at the lowest point of the texture.
Many engineered floors — particularly the thinner, budget-oriented products installed in the early 2000s — have wear layers well under 2mm. Those floors cannot be sanded. Attempting to sand them risks cutting through the veneer entirely and exposing the plywood core, which is irreversible damage. If that’s what you have, the options are either a no-sand surface treatment (if the finish is still intact) or replacement.
This is one of the questions we hear frequently from Nassau County, NY homeowners, and it’s worth addressing directly: if you’re not sure whether your floor is solid hardwood or engineered, we can usually tell just by looking at the end grain at a threshold or vent opening. You don’t need to pull up a board to find out. If it is engineered, the wear layer thickness can often be estimated based on the product and its age, though a precise measurement sometimes requires removing a floor vent to examine the edge of a board.
The reason this matters for the sanding floors conversation is straightforward: not every floor that looks like it needs sanding can actually be sanded. Getting that assessment right before work begins is the difference between a great outcome and a very expensive mistake. It’s one of the reasons experience counts in this trade — knowing what you’re looking at before you start is as important as knowing how to run the equipment.
What to Expect When You’re Ready to Move Forward
Sanding floors is not a simple job, but it’s also not the horror story some homeowners have been led to expect. When the process is done correctly — proper inspection, progressive grit stages, real dust containment, adequate cure time — the result is a floor that looks genuinely new and lasts for years.
The most important thing you can do before committing to any contractor is ask them to explain the process. Not a summary — the actual steps, the equipment they use, how they handle dust, and what they’ll do if they find a problem mid-job. A contractor who can answer those questions clearly and confidently is one who actually knows what they’re doing.
If you’re in Nassau County, NY and your floors have been on your mind, we at KO Floors, Inc. have been doing this work on Long Island for over 50 years. Reach out for a no-obligation quote — we’ll come take a look at the floor first and give you a straight answer about what it actually needs.